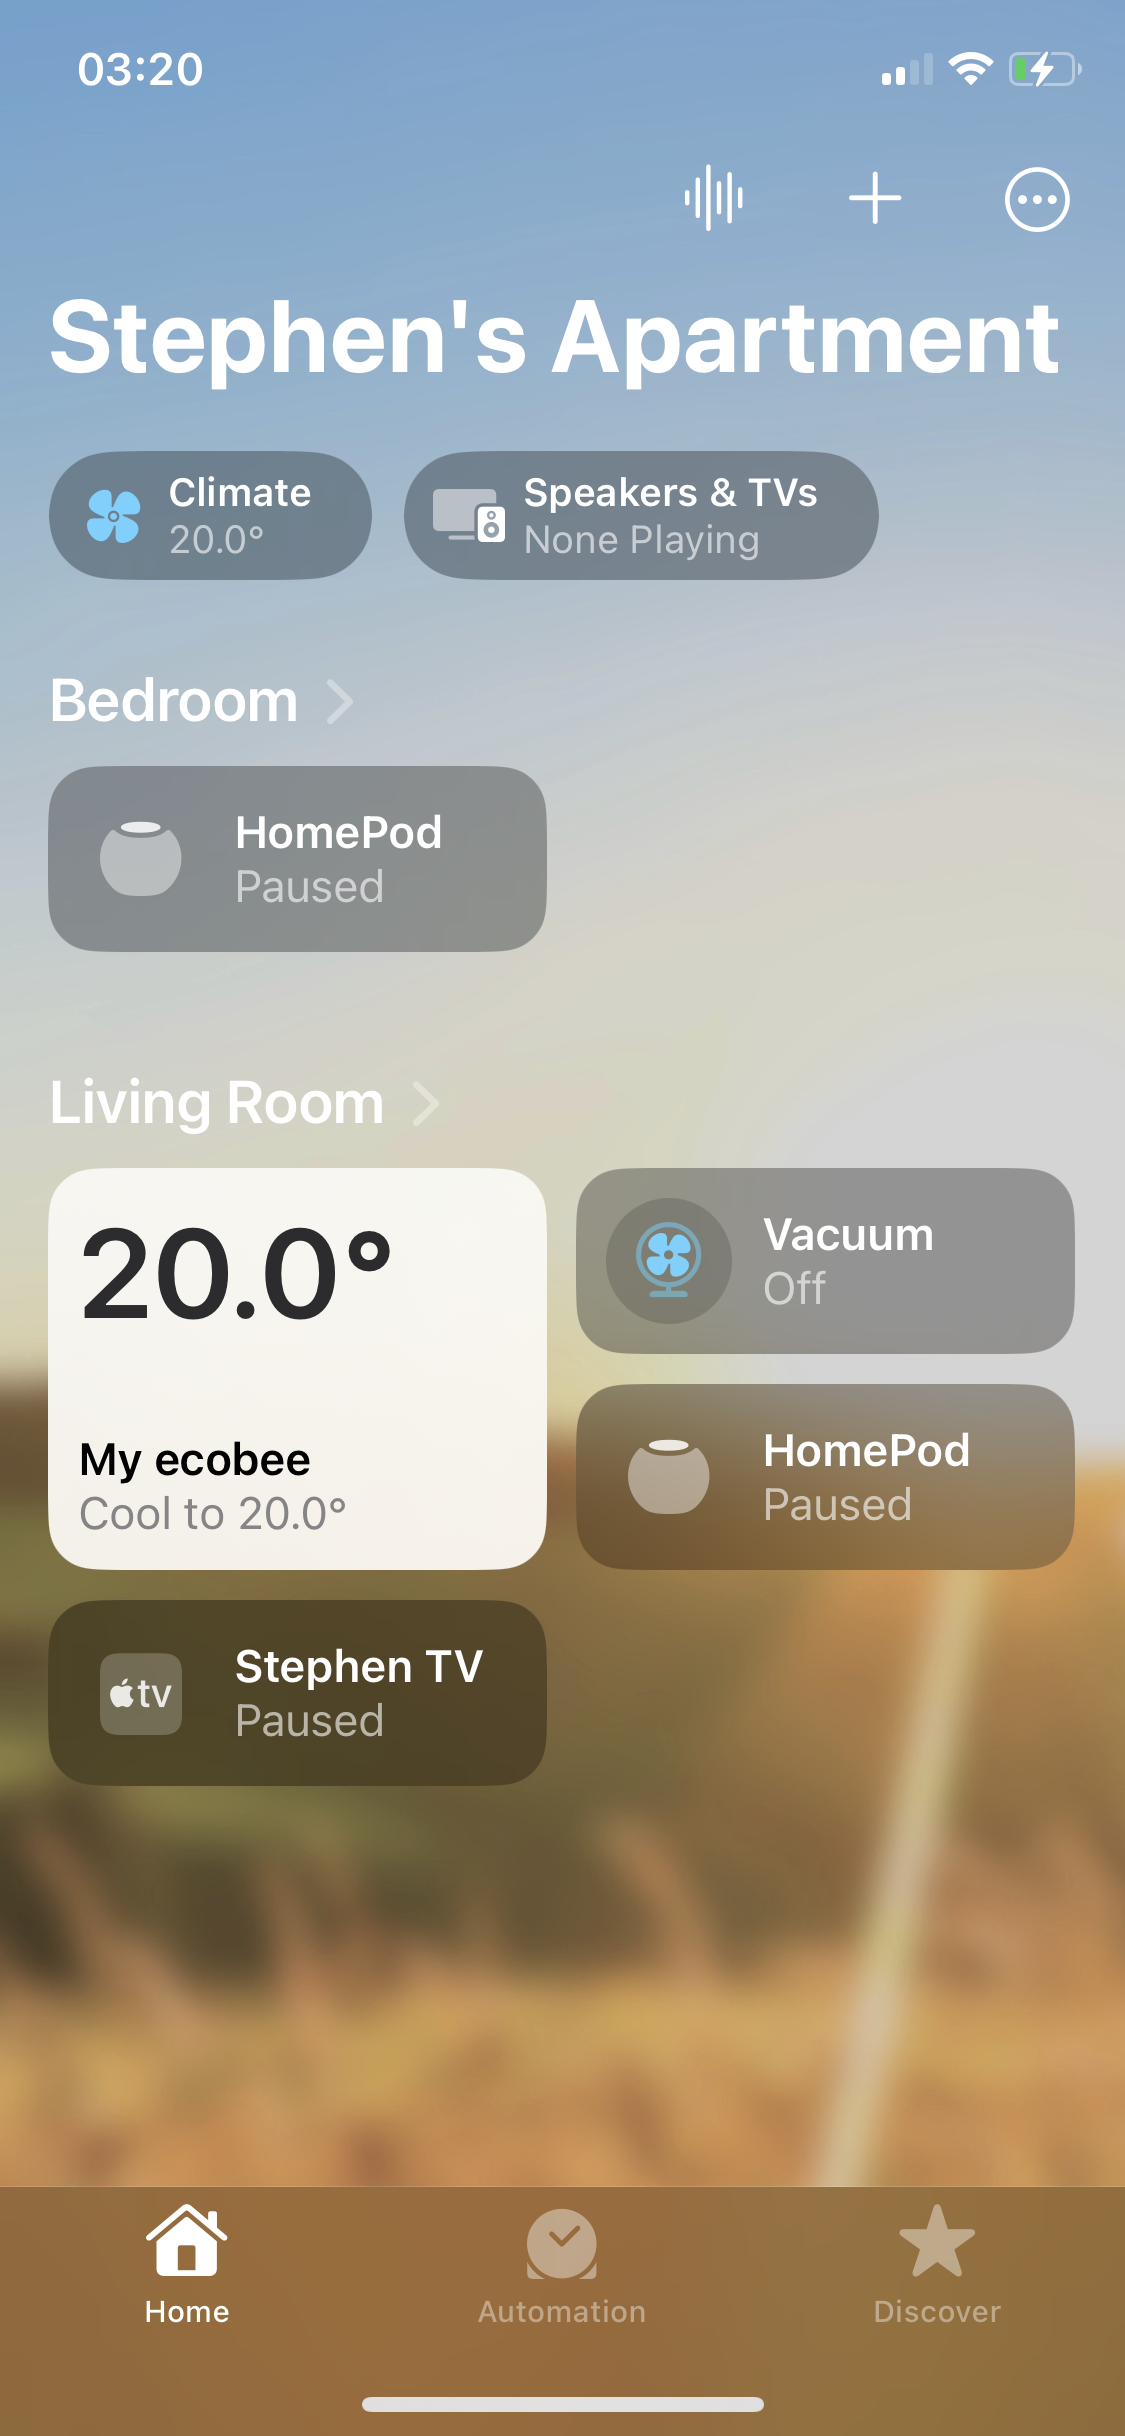
For the last couple years, I’ve had a habit of vacuuming my apartment Thursday afternoons while listening to a weekly live-streamed all-hands meeting for work. Mid summer, this meeting was rescheduled to a monthly cadence, so, with my dedicated vacuuming time gone and my floor getting dusty, I bought a robot vacuum.
The same week, iRobot, maker of the Roomba line of robotic vacuums, was in the news after announcing a deal to sell out to Amazon. I’m not interested in handing Amazon a map of my apartment, so that took any of iRobot’s Wi-Fi-enabled vacuums (which is all of them) off the table. Amazon acquisition aside, I’m not a fan of Wi-Fi-enabled appliances anyway because I don’t trust them to a) be secure, b) respect my privacy, c) work well, or d) function at all after the manufacturer inevitably drops support for them a few years down the line. All of these “features” usually come at a premium, too!
So, I bought an Anker Eufy RoboVac 11S (from Amazon 🙈) for a cool $169.99. The 11S is basically a sleeker-looking clone of the original Roomba from 2002; it has almost the exact same feature set, minus support for “virtual walls”, which are infrared beacons that let you restrict the Roomba from passing through certain doorways. Critically, like the 2002 Roomba, the 11S has no Wi-Fi– it’s controlled using an infrared remote to select between cleaning modes and schedule cleaning sessions in advance. I figured this would meet my needs perfectly: random-pattern Wi-Fi-less cleaning on a schedule; all I’d have to do was empty the dustbin.
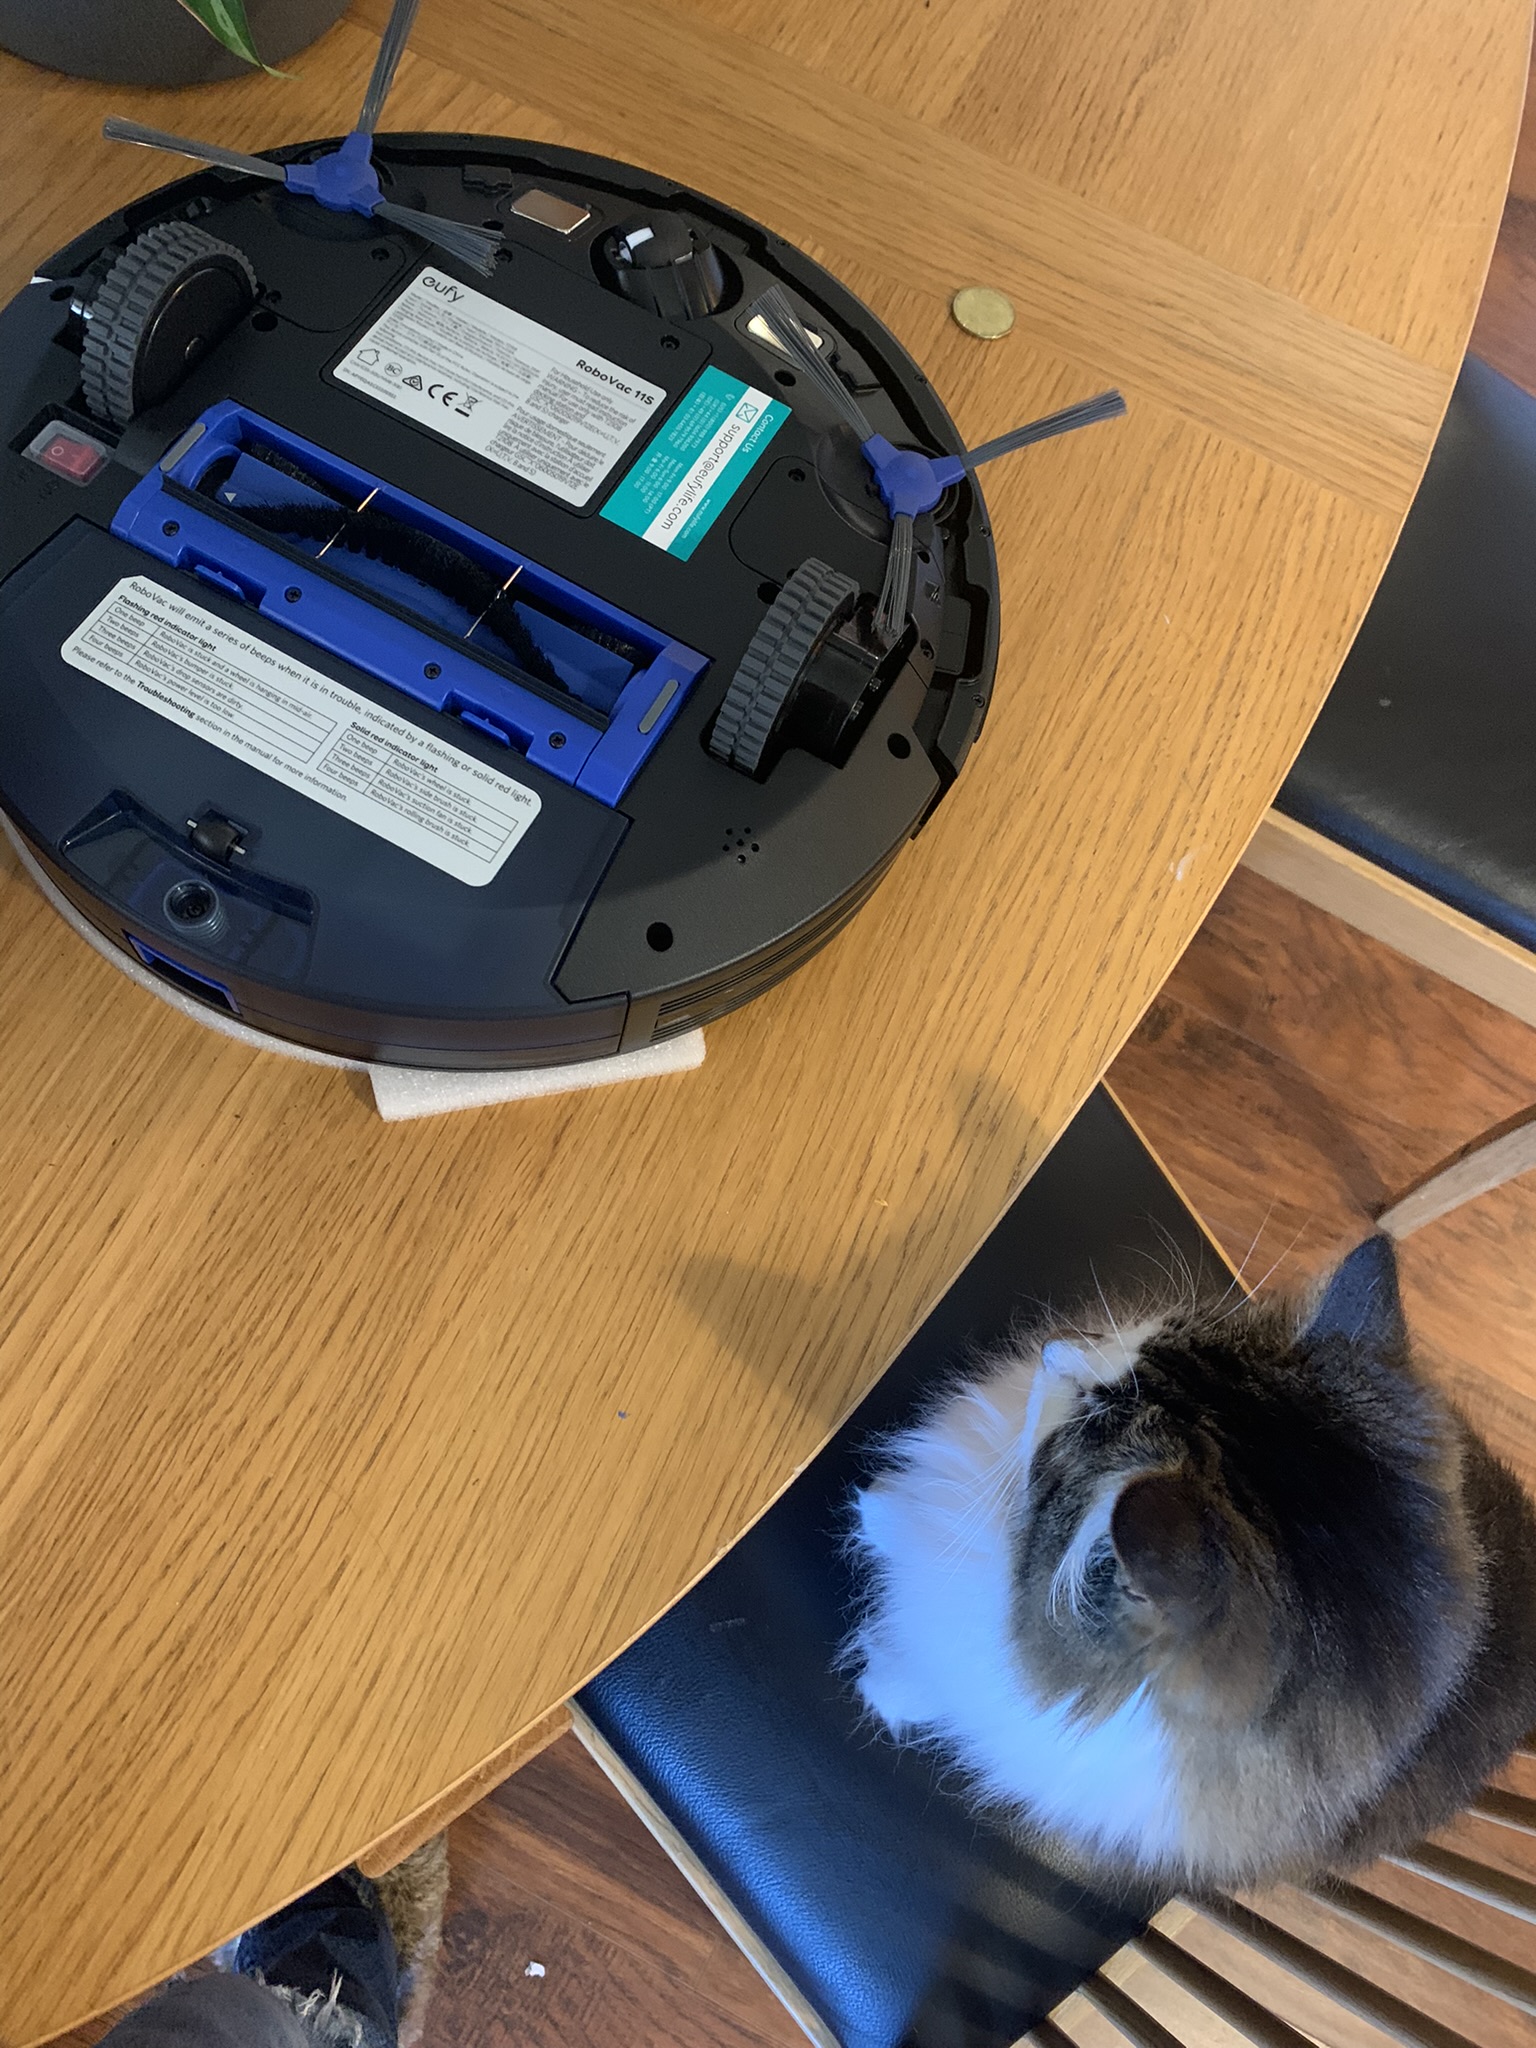
As it turned out, the remote’s scheduling feature could only schedule cleanings up to 24 hours in advance; not “every afternoon at hh:mm” or “every second day at hh:mm”, just “the next time it’s hh:mm”, which, in my opinion, is little better than just manually starting the vacuum. I quickly got tired of doing either and set out to automate the automatic vacuum.
Plan of Attack
- Record the remote’s infrared signals.
- Program an ESP32 Wi-Fi microcontroller to transmit appropriate remote signals when triggered by HomeKit (Apple’s iOS-integrated smart home system).
- Implant the chip into the vacuum.
- Control the vacuum from my phone and use HomeKit automations to schedule vacuuming.
Let’s get to it.
Recording Infrared Signals
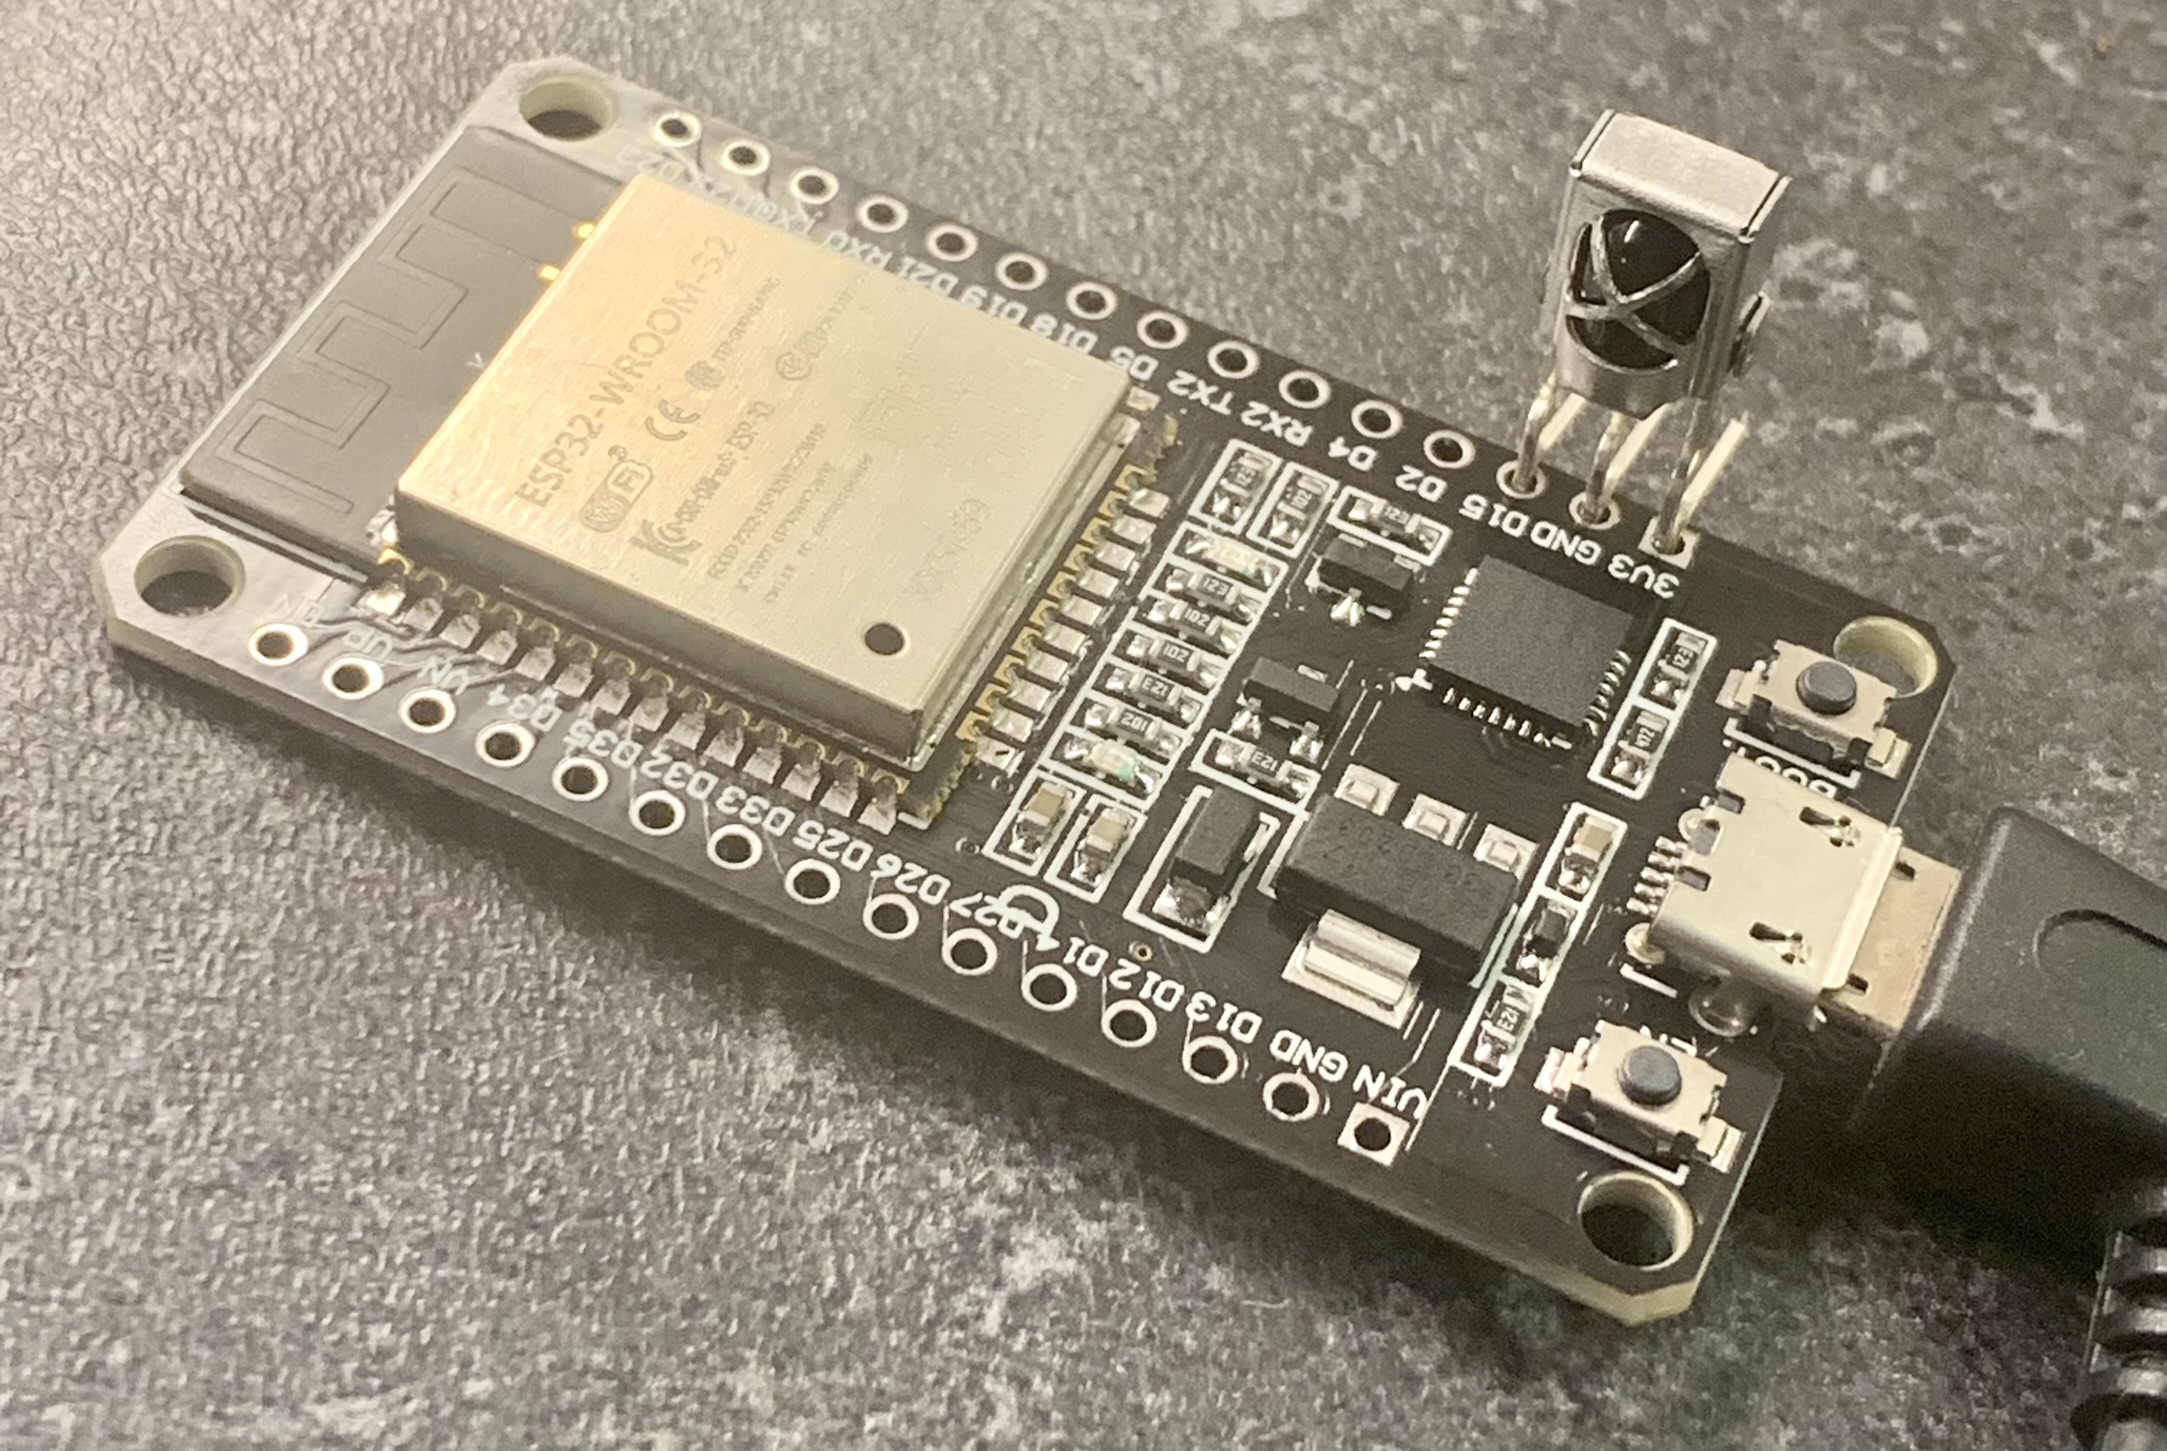
Like the infrared remote controls for most consumer electronics, the Eufy remote emits signals consisting of sequences of bits encoded as timed pulses of 940 nm light modulated at 38 kHZ, to distinguish the signal from environmental interference, e.g. from sunlight. Recording the signals was straightforward: I plugged a 38 kHz IR demodulator into an ESP32 development board, uploaded an IR receiving demo sketch from the Arduino-IRremote Arduino library (the ESP32 is Arduino-compatible), and blasted away, logging the codes output in the Arduino IDE’s serial monitor for each signal received from the remote.
The output from Arduino-IRremote’s receiver demo looks like this:
1
uint32_t tRawData[]={0x7D16, 0xA4FF};
2
IrSender.sendPulseDistanceWidthFromArray(38, 3050, 2950, 550, 1500, 550, 500, &tRawData[0], 48, PROTOCOL_IS_LSB_FIRST, <millisofRepeatPeriod>, <numberOfRepeats>);
Each received transmission is encoded as an array of 32-bit segments, where, if the signal were to be replayed, the segments would be transmitted in order, each one sent bit-by-bit with the least significant bit first. The second line of output demonstrates how to play back a signal, it includes all the parameters that characterize the transmission:
Signal parameters
Frequency:    38 kHz
Header mark:  3050 μs
Header space: 2950 μs
One mark:     550 μs
One space:    1500 μs
Zero mark:    550 μs
Zero space:   500 μs
Length:       48 bits
LSB/MSB:      LSB first
I converted the 32-bit segmented output for all the commands I recorded to a bitwise representation for easier analysis:
1
def ir_data_to_bit_string(data_array, n_bits, lsb_first = True):
2
str = ""
3
for segment in data_array:
4
segment_bits = "{:0{width}b}".format(segment, width=(32 if n_bits > 32 else n_bits))
5
if lsb_first:
6
segment_bits = segment_bits[::-1]
7
str = str + segment_bits
8
n_bits = n_bits - 32
9
return str
After some staring and squinting, I derived the following specification for the signals generated by the remote:
Signal specification
                                                                              Protocol identifier
                                                                             /        Command
                                                                            /        /    Unused
                                                                           /        /    /  Fan mode
                                                                          /        /    /  /  Clock hours
                                                                         /        /    /  /  /        Clock minutes
                                                                        /        /    /  /  /        /        Scheduled cleaning time
                                                                       /        /    /  /  /        /        /        Checksum
                                                                      /        /    /  /  /        /        /        /
Command          Clock     Fan mode  Schedule  Data                  0        8    12 14 16       24       32       40

Change fan mode  12:00 am  Standard  ---       {0x7816, 0xA1FF}      01101000 0001 11 10 00000000 00000000 11111111 10000101
Change fan mode  12:00 am  BoostIQ   ---       {0xB816, 0x21FF}      01101000 0001 11 01 00000000 00000000 11111111 10000100
Change fan mode  12:00 am  Max       ---       {0x3816, 0xC1FF}      01101000 0001 11 00 00000000 00000000 11111111 10000011

Set time         12:00 am  Standard  ---       {0x7D16, 0xA4FF}      01101000 1011 11 10 00000000 00000000 11111111 00100101
Set time         12:01 am  Standard  ---       {0x80007D16, 0x64FF}  01101000 1011 11 10 00000000 00000001 11111111 00100110
Set time         12:02 am  Standard  ---       {0xC0007D16, 0x14FF}  01101000 1011 11 10 00000000 00000010 11111111 00101000
Set time         12:03 am  Standard  ---       {0x20007D16, 0x94FF}  01101000 1011 11 10 00000000 00000011 11111111 00101001
Set time         01:00 am  Standard  ---       {0x807D16, 0x64FF}    01101000 1011 11 10 00000001 00000000 11111111 00100110
Set time         01:01 am  Standard  ---       {0x80807D16, 0xE4FF}  01101000 1011 11 10 00000001 00000001 11111111 00100111
Set time         02:00 am  Standard  ---       {0x407D16, 0xE4FF}    01101000 1011 11 10 00000010 00000000 11111111 00100111
Set time         12:00 pm  Standard  ---       {0x307D16, 0x8CFF}    01101000 1011 11 10 00001100 00000000 11111111 00110001
Set time         01:00 pm  Standard  ---       {0xB07D16, 0x4CFF}    01101000 1011 11 10 00001101 00000000 11111111 00110010

Auto clean       12:00 am  Standard  ---       {0x7016, 0xAEFF}      01101000 0000 11 10 00000000 00000000 11111111 01110101
Auto clean       12:00 am  BoostIQ   ---       {0xB016, 0x2EFF}      01101000 0000 11 01 00000000 00000000 11111111 01110100
Auto clean       12:00 am  Max       ---       {0x3016, 0xCEFF}      01101000 0000 11 00 00000000 00000000 11111111 01110011

Up               12:00 am  Standard  ---       {0x7416, 0xA9FF}      01101000 0010 11 10 00000000 00000000 11111111 10010101
Down             12:00 am  Standard  ---       {0x7E16, 0xA7FF}      01101000 0111 11 10 00000000 00000000 11111111 11100101
Left             12:00 am  Standard  ---       {0x7C16, 0xA5FF}      01101000 0011 11 10 00000000 00000000 11111111 10100101
Right            12:00 am  Standard  ---       {0x7616, 0xABFF}      01101000 0110 11 10 00000000 00000000 11111111 11010101

Start            12:00 am  Standard  ---       {0x7A16, 0xA3FF}      01101000 0101 11 10 00000000 00000000 11111111 11000101
Start            12:00 am  BoostIQ   ---       {0xBA16, 0x23FF}      01101000 0101 11 01 00000000 00000000 11111111 11000100
Start            12:00 am  Max       ---       {0x3A16, 0xC3FF}      01101000 0101 11 00 00000000 00000000 11111111 11000011

Stop             12:00 am  ---       ---       {0xF216, 0x6DFF}      01101000 0100 11 11 00000000 00000000 11111111 10110110

Spiral           12:00 am  Max       ---       {0x3116, 0xCFFF}      01101000 1000 11 00 00000000 00000000 11111111 11110011
Edge             12:00 am  Max       ---       {0x3916, 0xC0FF}      01101000 1001 11 00 00000000 00000000 11111111 00000011

Room             12:00 am  Standard  ---       {0x7516, 0xA8FF}      01101000 1010 11 10 00000000 00000000 11111111 00010101
Room             12:00 am  BoostIQ   ---       {0xB516, 0x28FF}      01101000 1010 11 01 00000000 00000000 11111111 00010100
Room             12:00 am  Max       ---       {0x3516, 0xC8FF}      01101000 1010 11 00 00000000 00000000 11111111 00010011

Go home          12:00 am  ---       ---       {0xF716, 0x6AFF}      01101000 1110 11 11 00000000 00000000 11111111 01010110

Set schedule     12:00 am  ---       12:00 am  {0xF316, 0xEC00}      01101000 1100 11 11 00000000 00000000 00000000 00110111
Set schedule     12:00 am  ---       12:15 am  {0xF316, 0x1C80}      01101000 1100 11 11 00000000 00000000 00000001 00111000
Set schedule     12:00 am  ---       12:30 am  {0xF316, 0x9C40}      01101000 1100 11 11 00000000 00000000 00000010 00111001
Set schedule     12:00 am  ---       12:45 am  {0xF316, 0x5CC0}      01101000 1100 11 11 00000000 00000000 00000011 00111010
Set schedule     12:00 am  ---       01:00 am  {0xF316, 0xDC20}      01101000 1100 11 11 00000000 00000000 00000100 00111011
Set schedule     12:00 am  ---       11:45 pm  {0xF316, 0x69FA}      01101000 1100 11 11 00000000 00000000 01011111 10010110
Checksum
The final byte of the message is a checksum. By inspection, I determined that it’s equal to the first 5 bytes added together, with the most significant bit of the result dropped.
Other notes
- Obviously, not all possible combinations are represented above.
- The current time and scheduled cleaning time can be included with any other command.
- The current time has minute precision, while a future cleaning can only be scheduled in 15 minute increments. That’s because there are 2 bytes for setting the time and only 1 for setting a schedule.
- Up, Down, Left, and Right commands can be sent in any fan mode.
- Spiral and Edge cleaning commands are always sent with the fan mode set to Max.
- I didn’t really need to figure out any of this– I could have just naively recorded the relevant commands from the remote, but I wanted to understand what they meant. My curiouity was piqued when I noticed that same button triggered a different signal depending what time it was, hinting at the fact made clear above that the current time is encoded in every transmission.
HomeKit
With the remote signals decoded, the next step was to figure out how to get the ESP32 and HomeKit to play together.
HomeKit is Apple’s framework for controlling smart devices. Devices can be controlled by Siri or using Apple’s Home App. The UI/UX of the app is entirely dictated by Apple, with manufacturers getting no say in how the user interacts with a device. Under the hood, communication between HomeKit and smart devices is based on the HomeKit Accessory Protocol. HAP’s model consists of accessories (devices), which implement services (“Light Bulb”, “Fan”, “Temperature Sensor”, etc.), which possess characteristics (e.g. “Brightness”, “On”, and “CurrentTemperature”), which have a state (a boolean or an integer, mainly). An accessory may implement multiple services; services, depending on the type, must possess certain characteristics and may possess others. A “Light Bulb”, for example, must possess an “On” characteristic (true or false) but may also include “Brightness”, or “Hue”, or a couple other optional characteristics; how these characteristics are displayed to the user is up to the Home app.
There’s an extremely polished HomeKit library for the ESP32 called HomeSpan, which abstracts away all of the networking details and HAP-related communication, basically trivializing writing the software for a HomeKit device to 1) describing the accessory/service/characteristic relationships and 2) writing the logic for controlling the physical device. HomeSpan includes an excellent tutorial in the form of 20 progressively more complicated examples which walk you through the features of HAP and HomeSpan.
There’s not much more to say about HomeKit, except that it’s conspicuously missing a “Robot Vacuum” service (this is probably a pain in the ass for iRobot– the company just this year announced support for Siri shortcuts, which are basically a hackier DIY version of HomeKit). I decided that for the convenience of HomeKit integration, my vacuum could just as well pretend to be a fan, which is technically correct, anyway.
Here’s the code. Points of interest:
DEV_Vacuumextends the built-inService::Fanclass and overrides itsupdateandloopmethods.updateis called when HomeKit sends a request to update the device state;loopis called repeatedly and allows the device to do things and communicate state changes back to HomeKit as necessary.- A reset button clears the ESP32’s non-volatile storage. This puts the device back into a Wi-Fi access point setup mode in which you can configure Wi-Fi credentials and HomeKit pairing information.
- The “Fan” service has an “Active” characteristic (on/off) and a “RotationSpeed” characteristic, for which I’m mapping 1 to Standard, 2 to BoostIQ, and 3 to Max (BoostIQ is a “smart” combination of Standard and Max).
- In “auto” mode, the stock vacuum cleans for 100 minutes or until the battery is low, then returns home. I’ve programmed the HomeKit controller to send the vacuum home after 90 minutes, since it doesn’t have any way to recognize when the vacuum has independently decided it’s done.
- Each remote signal is sent four times to reduce the chance of any commands being missed (I didn’t do this originally and had to take the vacuum apart again to upload a fix 🤦).
- Incidentally, I helped fix a bug in the IR library related to repeating signals.
homespan_sketch.ino
1
#include <HomeSpan.h>
2
#include <nvs_flash.h>
3
#include "dev_vacuum.h"
4
5
#define STATUS_LED_PIN 2
6
#define RESET_BUTTON_PIN 13
7
8
#define STATUS_AUTO_OFF 300
9
#define AP_AUTO_OFF 300
10
#define WEBLOG_ENTRIES 25
11
#define LOG_LEVEL 0
12
13
void setup() {
14
Serial.begin(115200);
15
16
configureResetButton();
17
configureHomeSpan();
18
}
19
20
void loop(){
21
pollResetButton();
22
homeSpan.poll();
23
}
24
25
void configureHomeSpan() {
26
homeSpan.setStatusPin(STATUS_LED_PIN);
27
homeSpan.setStatusAutoOff(STATUS_AUTO_OFF);
28
29
homeSpan.enableWebLog(WEBLOG_ENTRIES,"pool.ntp.org","UTC","log");
30
homeSpan.setLogLevel(LOG_LEVEL);
31
32
homeSpan.setApSSID("RobotVacuum-Setup");
33
homeSpan.setApTimeout(AP_AUTO_OFF);
34
homeSpan.enableAutoStartAP();
35
36
homeSpan.begin(Category::Fans,"Robot Vacuum", "RobotVacuum", "RobotVacuum");
37
38
new SpanAccessory();
39
40
new Service::AccessoryInformation();
41
new Characteristic::Identify();
42
43
new DEV_Vacuum();
44
}
45
46
void configureResetButton() {
47
pinMode(RESET_BUTTON_PIN, INPUT_PULLUP);
48
}
49
50
void pollResetButton() {
51
if (digitalRead(RESET_BUTTON_PIN) == LOW) {
52
Serial.print("\n*** Clearing non-volatile storage and restarting...\n\n");
53
nvs_flash_erase();
54
ESP.restart();
55
}
56
}
dev_vacuum.h
1
#include "vacuum_remote.h"
2
3
#define SPEED_STANDARD 1
4
#define SPEED_BOOSTIQ 2
5
#define SPEED_MAX 3
6
7
#define VACUUM_ON true
8
#define VACUUM_OFF false
9
10
#define AUTO_VACUUM_DURATION 90*60*1000 // 90 mins; max 100 mins
11
12
struct DEV_Vacuum : Service::Fan {
13
SpanCharacteristic *name;
14
SpanCharacteristic *power;
15
SpanCharacteristic *speed;
16
17
DEV_Vacuum() : Service::Fan() {
18
name = new Characteristic::Name("Robot Vacuum");
19
power = new Characteristic::Active();
20
speed = new Characteristic::RotationSpeed(SPEED_BOOSTIQ);
21
speed->setRange(SPEED_STANDARD - 1, SPEED_MAX, 1);
22
}
23
24
uint32_t timerStart;
25
26
boolean update() { // Called when HomeKit updates the state
27
if (power->getNewVal() == VACUUM_OFF) { // Off
28
VacuumRemote::command_send(VacuumRemote::Command::go_home);
29
} else if (power->getNewVal() == VACUUM_ON && power->getVal() == VACUUM_OFF) { // Off->On
30
if (speed->getNewVal() == SPEED_STANDARD) {
31
VacuumRemote::command_send(VacuumRemote::Command::auto_standard);
32
} else if (speed->getNewVal() == SPEED_BOOSTIQ) {
33
VacuumRemote::command_send(VacuumRemote::Command::auto_boostiq);
34
} else if (speed->getNewVal() == SPEED_MAX) {
35
VacuumRemote::command_send(VacuumRemote::Command::auto_max);
36
}
37
38
setTimer();
39
} else { // Just a speed change
40
if (speed->getNewVal() == SPEED_STANDARD) {
41
VacuumRemote::command_send(VacuumRemote::Command::change_fan_standard);
42
} else if (speed->getNewVal() == SPEED_BOOSTIQ) {
43
VacuumRemote::command_send(VacuumRemote::Command::change_fan_boostiq);
44
} else if (speed->getNewVal() == SPEED_MAX) {
45
VacuumRemote::command_send(VacuumRemote::Command::change_fan_max);
46
}
47
}
48
49
return true;
50
}
51
52
void loop() {
53
if (power->getVal() == VACUUM_ON && checkTimer()) {
54
power->setVal(VACUUM_OFF);
55
VacuumRemote::command_send(VacuumRemote::Command::go_home);
56
}
57
}
58
59
private:
60
61
void setTimer() {
62
timerStart = millis();
63
}
64
65
bool checkTimer() {
66
return millis() - timerStart > AUTO_VACUUM_DURATION;
67
}
68
};
vacuum_remote.h
1
#define IR_SEND_PIN 15
2
#include <IRremote.hpp>
3
4
namespace VacuumRemote {
5
struct CommandType {
6
uint32_t data[2];
7
char* name;
8
};
9
10
namespace Command {
11
CommandType auto_standard = {{0x7016, 0xAEFF}, "auto_standard"};
12
CommandType auto_boostiq = {{0xB016, 0x2EFF}, "auto_boostiq"};
13
CommandType auto_max = {{0x3016, 0xCEFF}, "auto_max"};
14
15
CommandType change_fan_standard = {{0x7816, 0xA1FF}, "change_fan_standard"};
16
CommandType change_fan_boostiq = {{0xB816, 0x21FF}, "change_fan_boostiq"};
17
CommandType change_fan_max = {{0x3816, 0xC1FF}, "change_fan_max"};
18
19
CommandType go_home = {{0xF716, 0x6AFF}, "go_home"};
20
}
21
22
void command_send(CommandType &command) {
23
WEBLOG("Sending remote command: %s", command.name);
24
25
IrSender.sendPulseDistanceWidthFromArray(
26
38, // uint_fast8_t aFrequencyKHz
27
3050, // unsigned int aHeaderMarkMicros
28
2950, // unsigned int aHeaderSpaceMicros
29
550, // unsigned int aOneMarkMicros
30
1500, // unsigned int aOneSpaceMicros
31
550, // unsigned int aZeroMarkMicros
32
500, // unsigned int aZeroSpaceMicros
33
command.data, // uint32_t[] aDecodedRawDataArray
34
48, // unsigned int aNumberOfBits
35
false, // bool aMSBFirst
36
//true, // bool aSendStopBit; only exists in main, not release
37
100, // unsigned int aRepeatPeriodMillis
38
3 // int_fast8_t aNumberOfRepeats
39
);
40
}
41
}
Vacuum Surgery
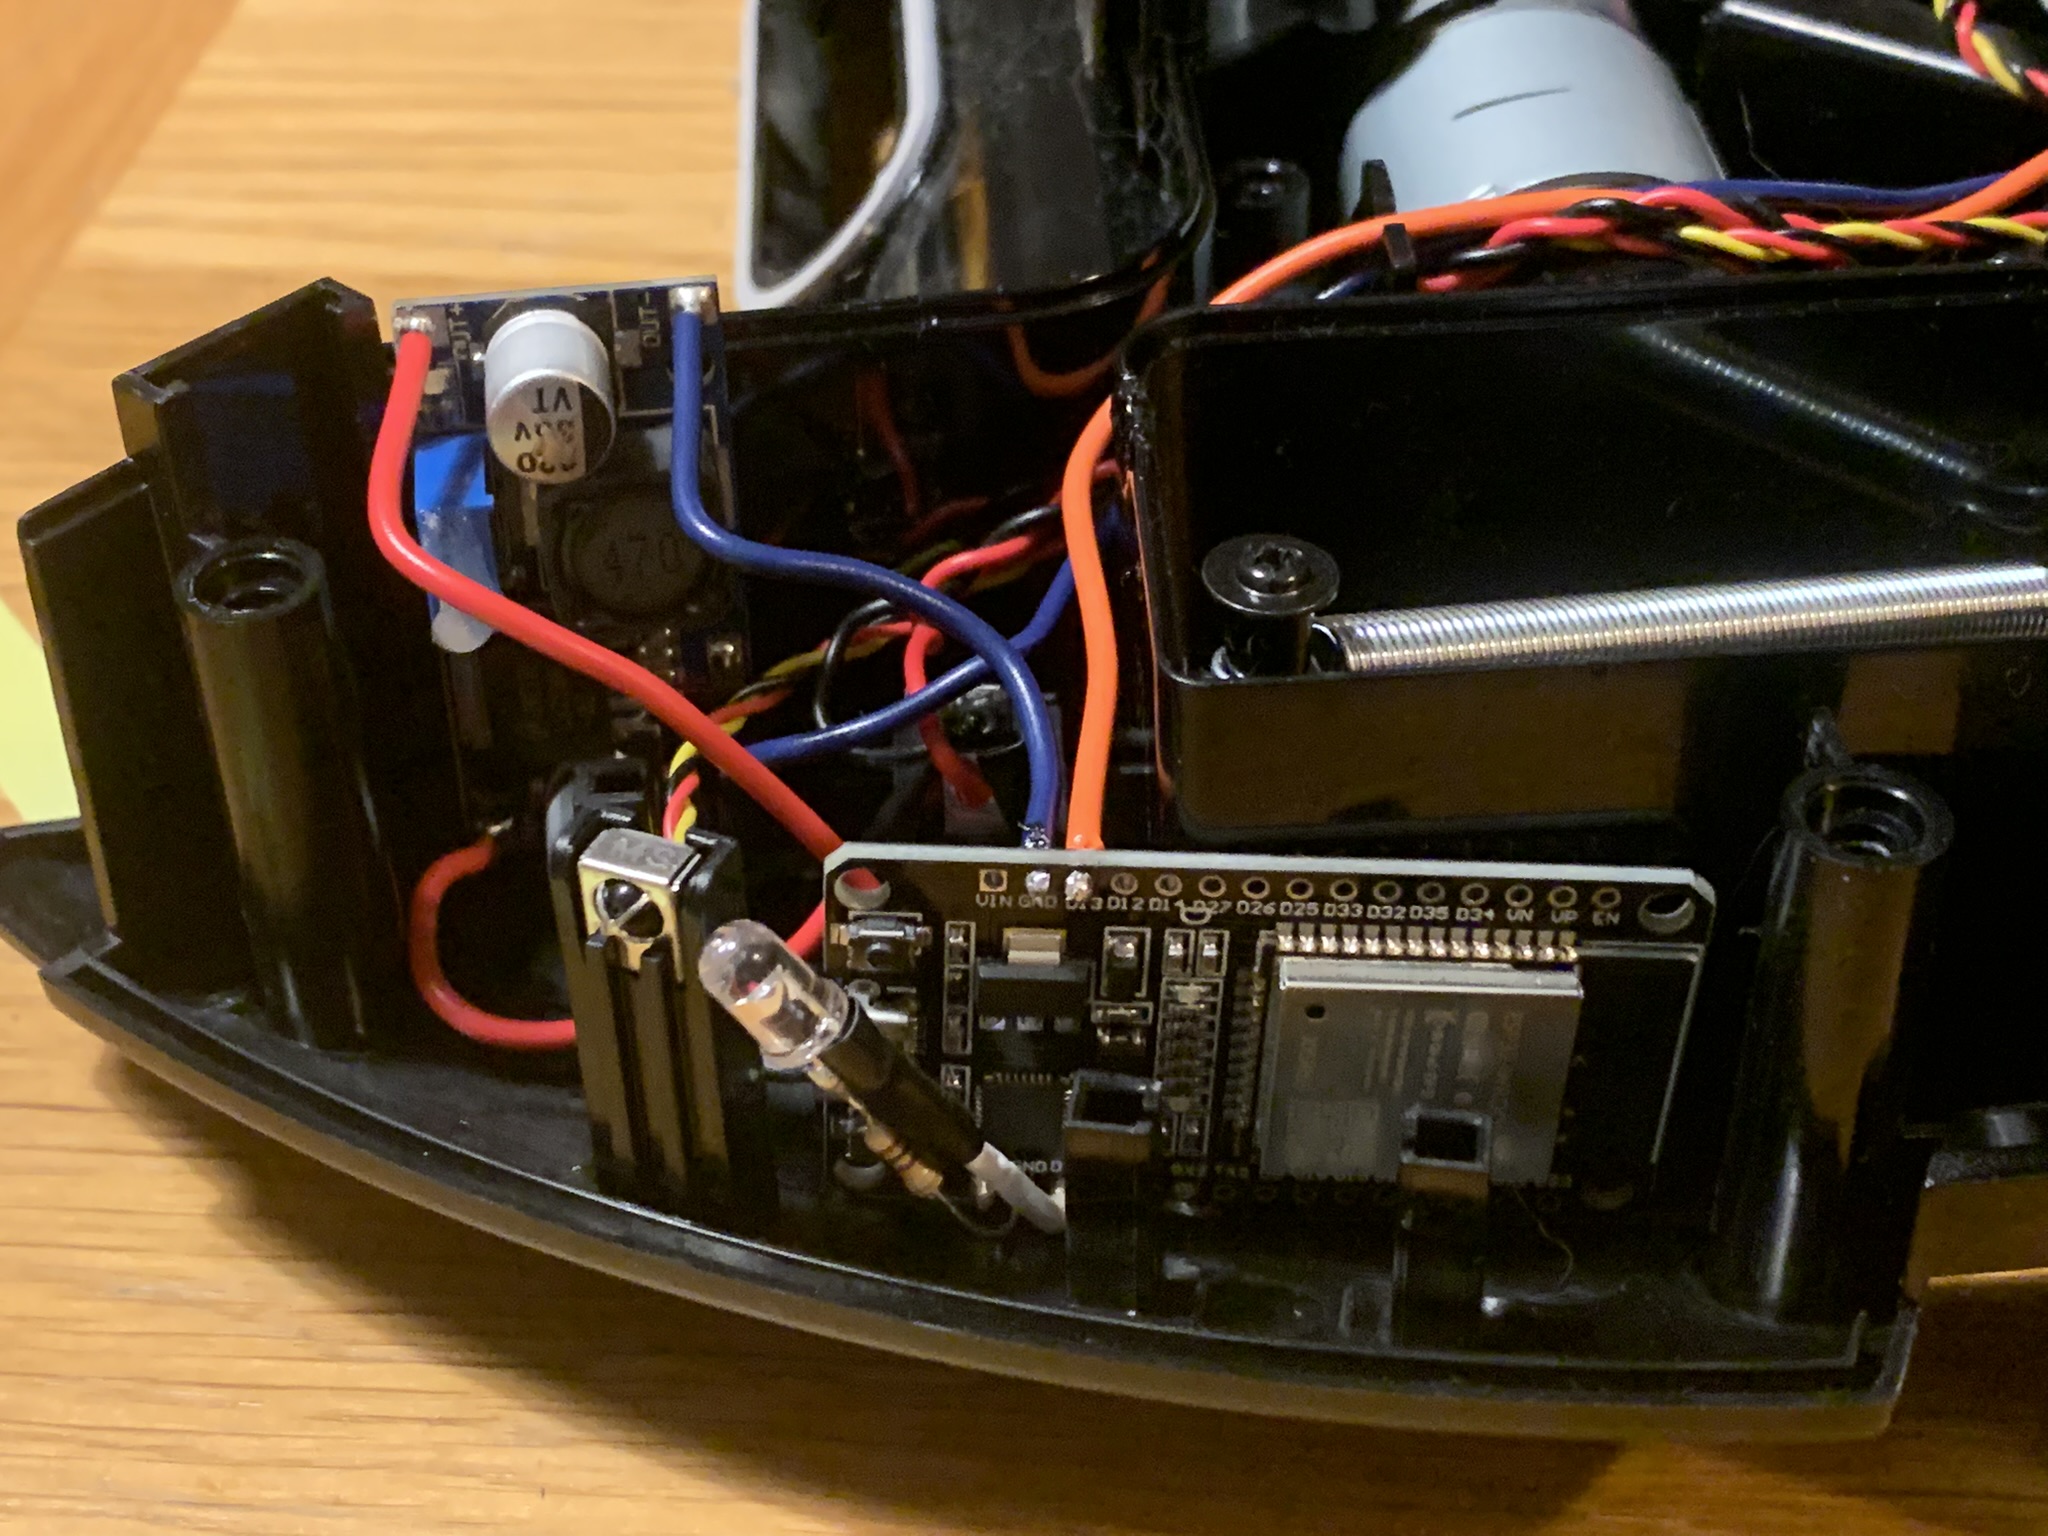
The final step was implanting the new Wi-Fi brain into the 11S. Disassembling the vacuum was extremely straightforward– it was obviously designed with repairability in mind. Luckily for me, despite the ‘S’ in 11S standing for “slim”, they didn’t squeeze out all the air, either. One corner of the shell, near the power switch, has a big empty space perfectly sized to accomodate my ESP32 board and a voltage regulator.
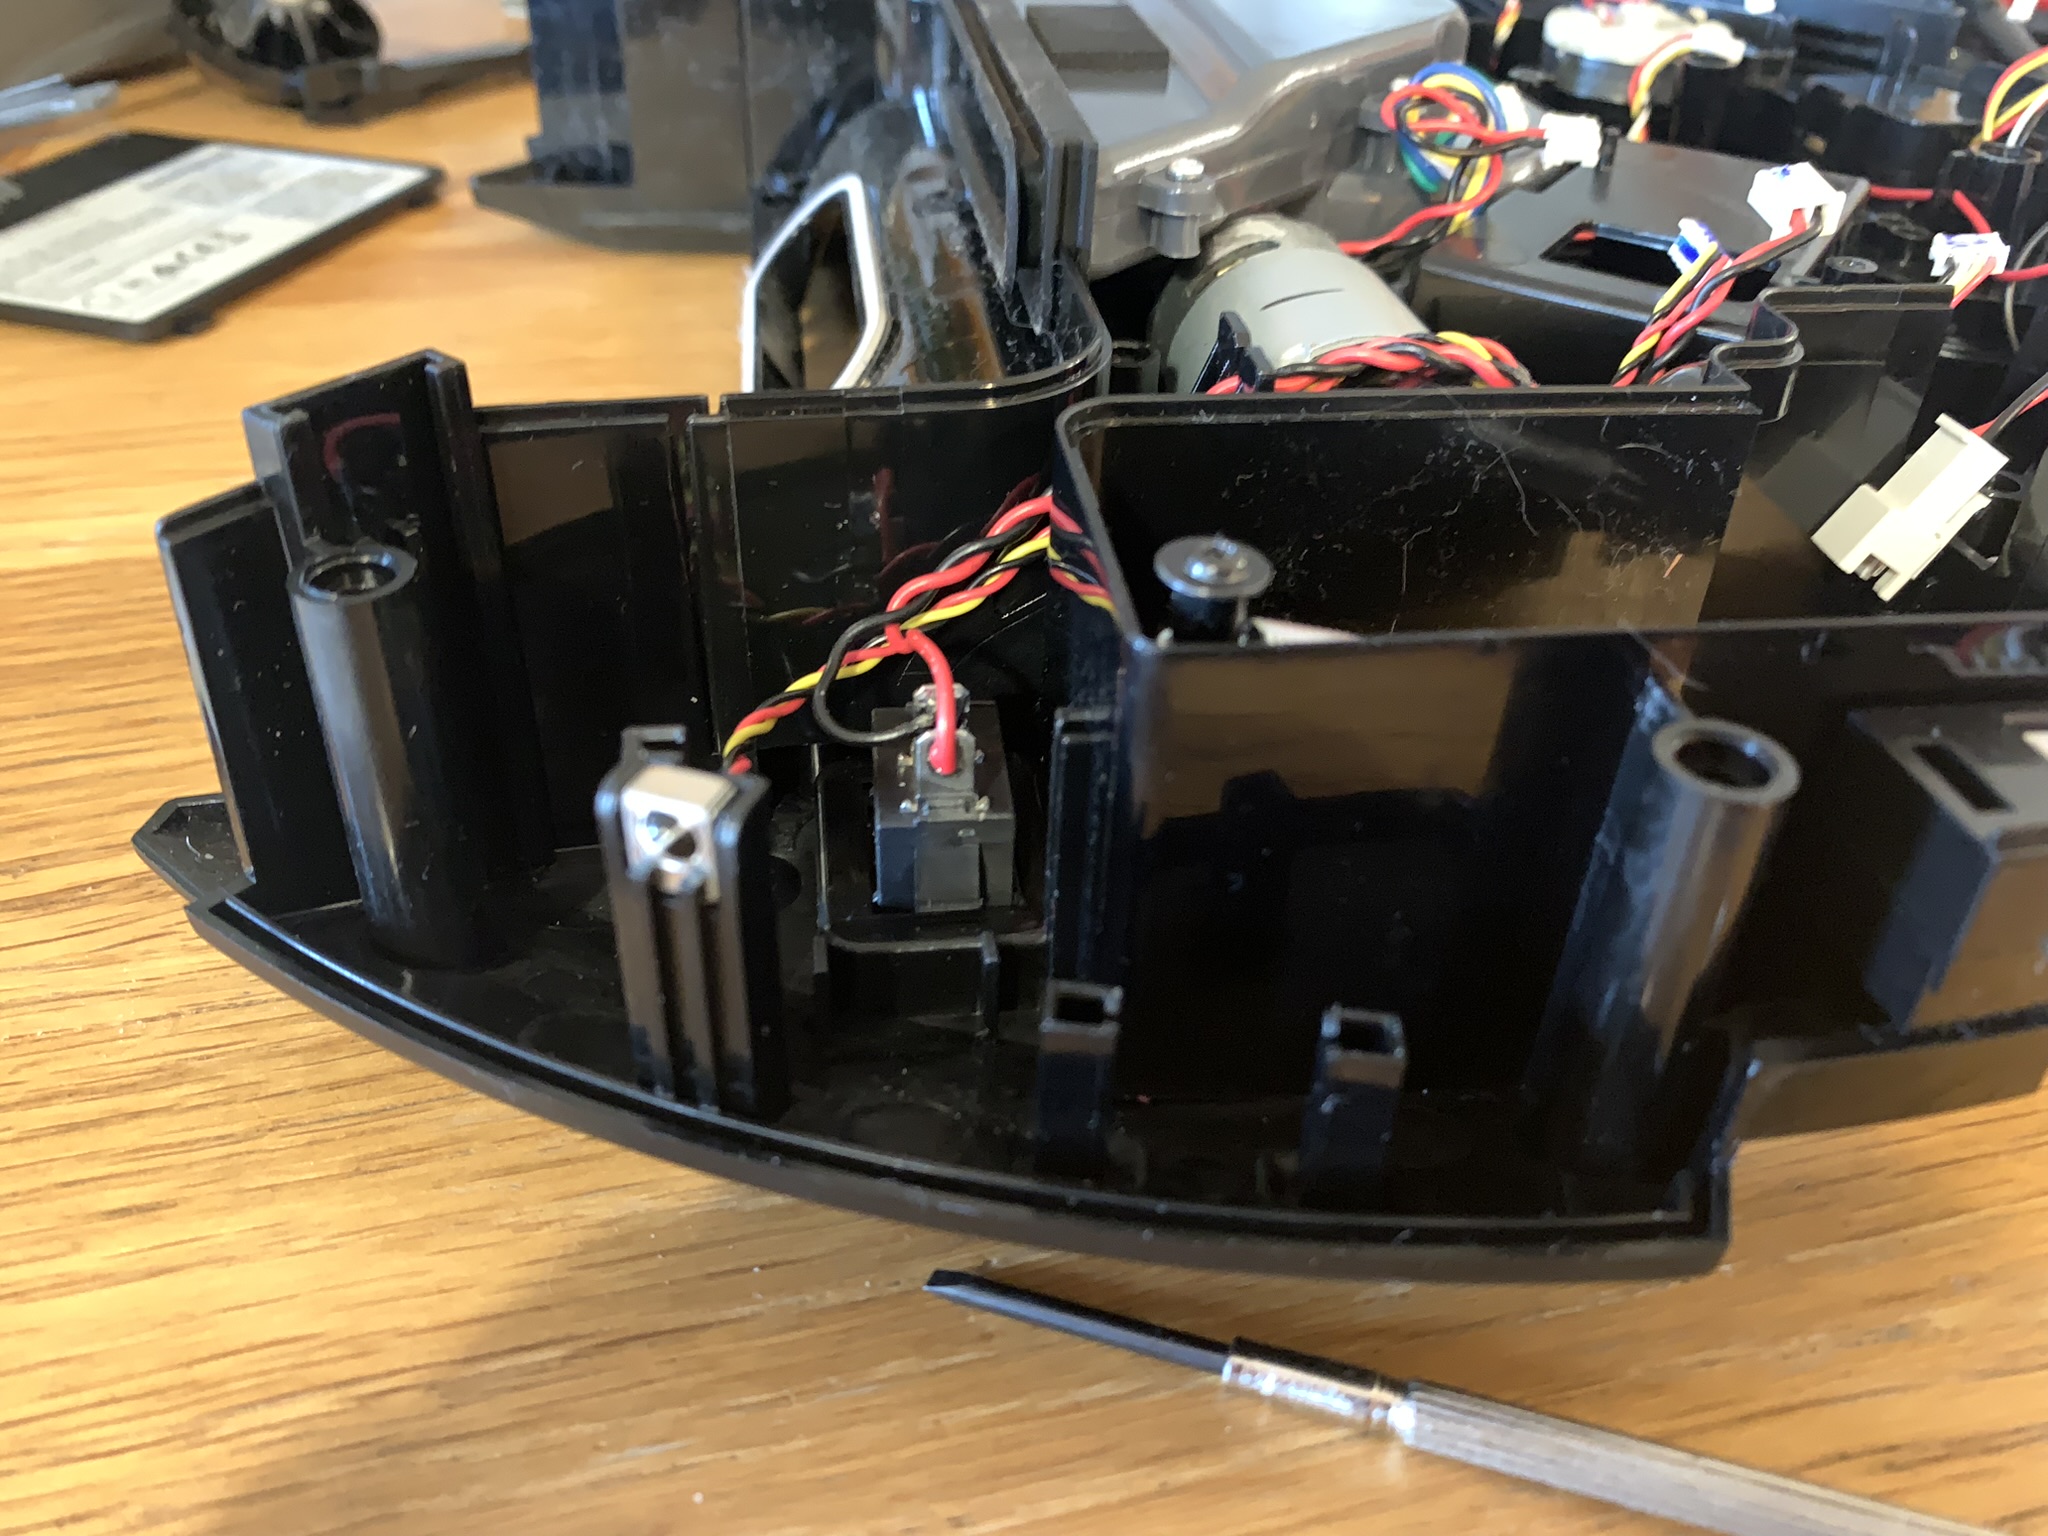
I went back and forth a bit on how to power the ESP32. The ESP32 runs on 3.3 V; the dev board includes a linear regulator to accomodate 4.75 V - 12 V input (so it can be powered by USB). The vacuum’s battery, consisting of four 18650 cells†, has a nominal voltage of 14.4 V (real voltage: 16.4 V). The vacuum’s logic board seems to run mostly on 3.3 V, but I measured 5 V across some sensors, and, although I didn’t test them, I assume the motors run on the full battery voltage. I considered powering the ESP32 straight from the logic board’s 3.3 V circuitry, but since the ESP can draw > 150 mA when using Wi-Fi and I had no idea what tolerences were built in to the 11S main board, rather than risk melting/enflaming anything, I opted to wire in a buck converter directly to the battery and power switch to drop the 16.4 V battery voltage down to 3.3 V (buck converters are semiconductor-based and vastly more efficient than linear regulators, which downshift voltage by dissipating extra power as heat).
†18650s are truly the modern AA. They power Teslas, e-cigarettes, flashlights, laptops, portable power banks, e-bikes, Bluetooth speakers, robo vacuums…
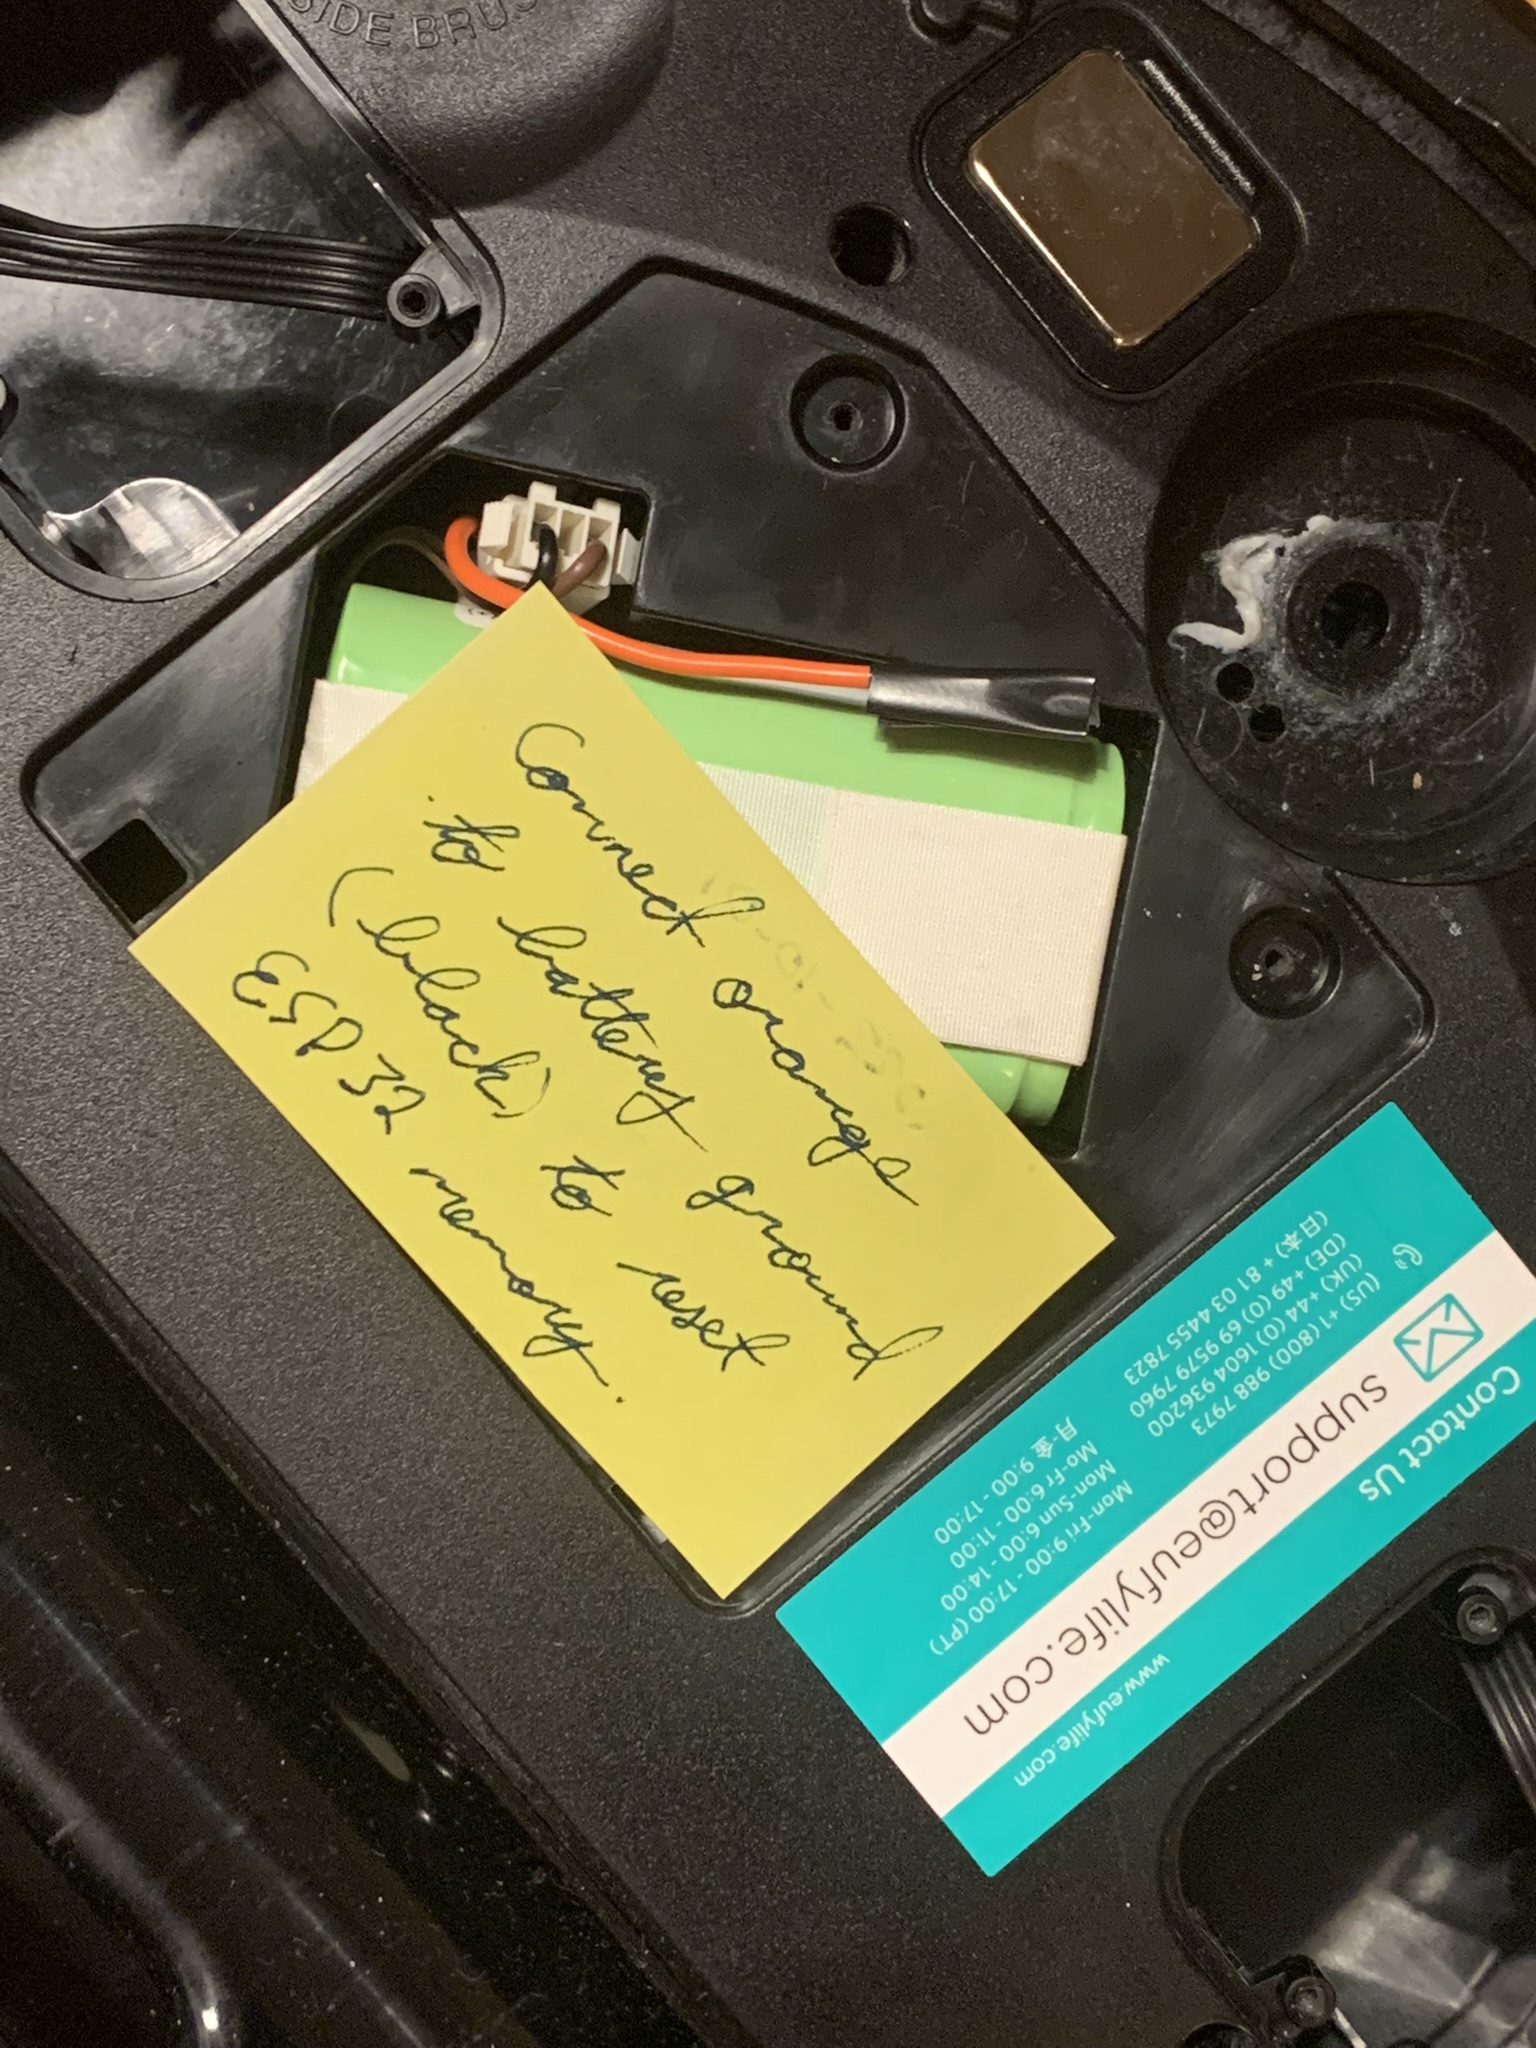
I mentioned a reset button earlier– if I have to change my Wi-Fi SSID or password, I don’t want to have to disassemble the vacuum to access the ESP32’s USB serial interface. I left a long wire connected to the button input and drew it out into the battery compartment, which is easily accessible from the outside. Touching the wire to the negative contact on the battery completes the button circuit and tells the ESP32 to clear its non-volatile storage (I left a note to remind my future self how this works).
Putting it all together, we get this:
- Buck converter wired in to the battery’s negative lead and the hard power switch.
- ESP32 powered from the buck converter.
- Infrared LED connected to the ESP32 and pointed directly at one of the vacuum’s several IR receivers.
- Reset wire tucked into the battery compartment.
Ta-da! I can now control the vacuum with Siri (“Hey Siri, turn on/off the vacuum”), manually in the Home app, or with HomeKit automations (e.g. “whenever everybody is out of the the house while the sun is up, turn on the vacuum for 30 minutes”). 🎉
